Anonymous

rear brake adjustment

Here’s where to discuss anything specific about your standard(ish) car or something that applies to the model in general.
Post Reply
gregory
Wedgling
Posts: 13
Joined: 30 Oct 2014 19:38
Location: United Kingdom
Contact:

rear brake adjustment

Postby gregory » 08 Apr 2015 19:49

Does any member have any tips to offer on adjusting the handbrake on my 1980 TR7dhc.The cable adjusters are on their limit,I have cleaned the self adjusters,inside the drums .They are free.Would worn clevis pins cause lost motion.Is there anyway to set the brakes up before connecting the cables? I can't figure out how the self adjuster does it's job ,when it is working as designed.The handbrake does hold ,not good enough for the MOT rollers

Another question ,can the rubber seal on the lower ball joint be chnged without releasing the sway bar.anti roll bar.Cheers Bob

mat

sonscar
Wedge Pilot
Posts: 488
Joined: 02 Jun 2013 16:09
Location: United Kingdom

Postby sonscar » 08 Apr 2015 20:19

Excessive handbrake adjustment is,I have found,often caused by worn shoes and drums,a little wear on both causing adjustment to run out quickly.I have found that the rear brakes are best adjusted by removing the drum and operating the brake(or hand brake,I forget) and listening for the clicks,trying the drum periodically until it is closely adjusted(slacken off the handbrake cable first and adjust it last)Just my experience,Steve..P.S you can spit the ball joint with the ARB still connected but requires force and care.

]Image
mine
Image[/URL]

busheytrader
TRemendous
Posts: 3145
Joined: 14 Oct 2007 17:49
Location: United Kingdom
Contact:

Postby busheytrader » 08 Apr 2015 20:26

Hi Matt,

I have to clean up the self adjusting mechanisms annually to make sure the handbrake works properly. It's probably at the limit of its adjustment now. I reckon the cables have stretched after 34 years although when it's parked in the garage the handbrake is off. Also the pivot points on the back plates used by the handbrake levers have opened up with wear. I've heard of others using weld as filler to close these up.

Adam

Image Image

TR7 V8 DHC Jaguar Solent Blue. 9.35cr Range Rover V8, Holley 390cfm, JWR Dual Port, 214 Cam, Lumention, Tubular Manifolds, S/S Single Pipe Exh, 3.08 Rear, 200lb Spax & PolyBushes all round, Anti- Dive, Strut-Top Roller Bearings, Capri Vented Discs & Calipers, Braided Hoses, 4 Speed Rear Cylinders, Uprated Master Cylinder & Servo, AT 14" 5 Spokes or Maestro Turbo 15" Alloys, Cruise Lights, S/S Heater Pipes, Replacement Fuel Tank. No Door Stickers. Mine since July 1986, V8 from 1991 courtesy of S&S V8 conversion kit (built not bought) and big brake kit.

gregory
Wedgling
Posts: 13
Joined: 30 Oct 2014 19:38
Location: United Kingdom
Contact:

Postby gregory » 09 Apr 2015 06:39

Thanks for the hints,I will follow them up,new shoes first.Strangely when I first got the car,the lever only moved two clicks with no effect on the brakes,now,after stripping and cleaning the system,I am on 7 clicks,it holds.I have loosened them off too much, I will try the the drum off method first.Thanks for your help MAT

mat

Hasbeen
TRemendous
Posts: 6474
Joined: 28 Apr 2005 12:32
Location: Australia
Contact:

Postby Hasbeen » 09 Apr 2015 11:01

Mat I wire brush polish all the parts of the shoes & the self adjustment mechanism when first installing then after a rebuild, then lubricate everything with graphite powder as they go in. My self adjusters are still working fine after over 10 years, & 70,000 kilometers.

Jolyon39 had a problem with his after having new linings fitted to his old shoes. They must have gone together in different places & were not self adjusting, & were sticking on a little. While polishing the areas I've mentioned, he found a dag of welding splatter on one shoe, which must not have been in the adjuster area as previously working. Once that was removed, & all parts polished & lubricated, everything worked fine.

I once had a Mitsubishi which had instructions to apply the handbrake while traveling gently backwards, to give best adjustment. I have no idea if it works on our cars, but I do it occasionally anyway.

Stag76 made up a very simple short lever extension for the handbrake lever at the drum backing plate. He was kind enough to give me a couple. They are simple to fit, & improve the handbrake operation & power very well. Hopefully he will see this & post a drawing of them.

Hasbeen

FI Spyder
TRemendous
Posts: 8920
Joined: 03 Jul 2006 19:54
Location: Canada

Postby FI Spyder » 09 Apr 2015 13:24

<blockquote id="quote"><font size="1" face="Century Gothic, Verdana, Arial, Helvetica" id="quote">quote:<hr height="1" noshade id="quote"><i>Originally posted by Hasbeen</i>

Mat I wire brush polish all the parts of the shoes & the self adjustment mechanism when first installing then after a rebuild, then lubricate everything with graphite powder as they go in. My self adjusters are still working fine after over 10 years, & 70,000 kilometers.
<hr height="1" noshade id="quote"></font id="quote"></blockquote id="quote">

I basically have the same experience. In the first winter I had disassembled the whole brake system, readying it for our foreign import (USA) safety check. All rear interior brake parts were cleaned and touching/moving parts were lightly lubed with a brake grease (it's a very thick, grey, high temp grease that won't migrate). The brakes shoes looked good as were reused as a slight weeping from the brake cylinders hadn't reached them. I used new cylinders as they were cheap, I had them in stock and time was becoming of the essence so didn't want to order rebuild kits and do them that way. Any moving surface was cleaned and lubed in the handbrake to activating levers. A new rubber cover for under car hand break mechanism as it was missing (as were most rubber parts on the car). It was adjusted to spec in the OEM manual. It holds the car on my steep driveway while I get out to put ramps under the front tires to change oil etc. but does need some muscle to ensure I have maximum holding power.

As an aside, I had adjusted my Tercel rear brakes to were I usually do (like them) and found I had worn out the rear drums. I looked in the manual and found they need 6 clicks not the 3 I usually like. Something unique to that car. Our car isn't like that.

I think I used the usual procedure (I think it's in the OEM manual) to do the rough adjustment of break shoes after the drums are on but it was 8 years ago and I have trouble remembering what I had for breakfast this morning.

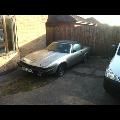
Shot of car on steep driveway to show what it will hold on.

Image


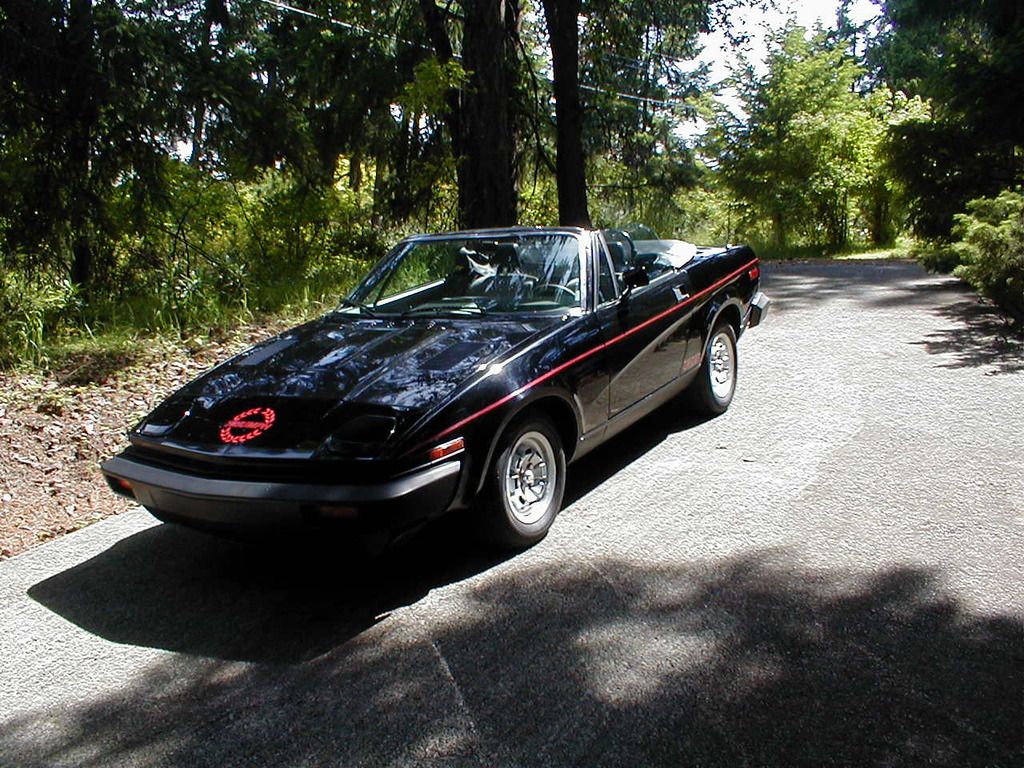
- - -TR7 Spider - - - 1978 Spitfire- - - - 1976 Spitfire - - 1988 Tercel 4X4 - Kali on Integra - 1991 Integra - Yellow TCT
Image

gregory
Wedgling
Posts: 13
Joined: 30 Oct 2014 19:38
Location: United Kingdom
Contact:

Postby gregory » 09 Apr 2015 18:47

Thanks for taking the trouble to answer my problem,this a great international forum. I think that backing up with the handbrake slightly on has done the job, holds really well now. I can't test it on the road as it's not legal.

My drive is steep, last year I parked my primera auto and neglected to put it into park, handbrake on. A little while later, the neighbour opposite asked if I was ok, because my car had demolished his wall. The brakes had cooled down. So I must get the TR brakes right.

Mat

john 215
TRemendous
Posts: 6867
Joined: 03 Dec 2006 17:12
Location: United Kingdom
Contact:

Postby john 215 » 10 Apr 2015 04:04

Hi,

Hand brakes on our cars are not the best in the world it is fair to say ( someone will pop up now and say there's will lock at 50 mph !!! ), remove your drums and clean up the shoes and the inside of the drum. As the handbrake lever enters the back plate, there is a pivot point these are really prone to seizing up, I would check this also. Click up the adjuster manually and refit the drum, you may need to back off the handbrake cable.

Back in the day as they say, in the dealership, we use disconnect the handbrake, and with the drum on [:o)] , pump the pedal and if you were lucky the self adjusters would work.

IF end up taking things apart then Jclay has a excellent guide on his site -


http://www.jclay.me/jclay/Rear_Brakes.html


You need 17% efficiency to pass the MOT in a set of rollers so no need for locking wheels.


Cheers John

ImageImageImage Image
LIVE LIFE A QUARTER OF A MILE AT A TIME!

1976 Speke FHC BEAUTY FITTED WITH OVERDRIVE GEARBOX

1979 3.5 FHC CURRENTLY GARDEN ART !

1982 2.0 DHC NOW A 4.6, BUILT NOT BROUGHT !!!!

Ianftr8
Swagester
Posts: 900
Joined: 12 Dec 2007 17:09
Location: United Kingdom
Contact:

Postby Ianftr8 » 13 Apr 2015 19:18

A very worthwhile job when doing the back brakes is to make sure that the cables are all free - that includes the from the handbrake / e brake lever all the way back to the rear wheels.

I have improved many cars over the years enormously but stripping out and lubricating everything properly.


Cheers
Ian

Ian Freeman
1979 TR8 DHC KDU 315V Poseidon Greens USA car that never crossed the pond.
Triumph Courier
Triumph owner for 32 years

jclay (RIP 2018)
TRemendous
Posts: 6027
Joined: 08 Jul 2006 17:13
Location: USA

Postby jclay (RIP 2018) » 13 Apr 2015 20:29

<blockquote id="quote"><font size="1" face="Century Gothic, Verdana, Arial, Helvetica" id="quote">quote:<hr height="1" noshade id="quote"><i>Originally posted by gregory</i>

Another question ,can the rubber seal on the lower ball joint be chnged without releasing the sway bar.anti roll bar? Cheers Bob

mat
<hr height="1" noshade id="quote"></font id="quote"></blockquote id="quote">

Tried that once, didn't like it! It is really dangerous to do that. You will have to use a spring compressor to hold the assembly in place. You can push the tapered bolt out of the knuckle by using the socket method.

<i> There is an easy way to remove the ball joint stud from the strut. Remove the cotter pin from the castle nut and break the nut loose. Get a socket from your tool box that will slide over the stud and sit on top of the castle nut and will just touch the bottom of the strut housing. Now loosen the nut, which will push the socket up against the strut housing until where is enough pressure on the nut that it then pushes the stud out the bottom of the strut.</i>

Clay

[url="http://www.jclay.me/"]My Triumph Site[/url], [url="http://www.triumphtechnical.me"]Technical Stuff[/url], [url="https://docs.google.com/folder/d/0B8MWEvqOpX3udEF4SmFQUW9RS09hbU5uNW5Wd0xrUQ/edit"]My Public Folder[/url],

dursleyman
TRiffic
Posts: 1573
Joined: 11 Jun 2007 22:55
Location: United Kingdom
Contact:

Postby dursleyman » 13 Apr 2015 21:00

<blockquote id="quote"><font size="1" face="Century Gothic, Verdana, Arial, Helvetica" id="quote">quote:<hr height="1" noshade id="quote"><i>Originally posted by Ianftr8</i>

A very worthwhile job when doing the back brakes is to make sure that the cables are all free - that includes the from the handbrake / e brake lever all the way back to the rear wheels.

I have improved many cars over the years enormously but stripping out and lubricating everything properly.


Cheers
Ian

Ian Freeman
1979 TR8 DHC KDU 315V Poseidon Greens USA car that never crossed the pond.
Triumph Courier
Triumph owner for 32 years
<hr height="1" noshade id="quote"></font id="quote"></blockquote id="quote">

I just put a new cable on mine and it made a huge difference. The handbrake is now light to use and has excellent "bite".

Russ

1981 TR7 Sprint DHC
Dursley
UK

http://tr7russ.blogspot.co.uk/

Image Image

Post Reply

Who is online

Users browsing this forum: No registered users and 40 guests