Anonymous

Steering Column Bush - UKC2322

Do you have a question? Ask it here! The reference library for all your DIY instruction guides, aka ‘surely there must be an easier way of doing this’.
Post Reply
sydney.wedgehead
Wedge Pilot
Posts: 341
Joined: 20 Jan 2012 13:52
Location: Australia
Contact:

Postby sydney.wedgehead » 03 Sep 2013 23:22

<blockquote id="quote"><font size="1" face="Century Gothic, Verdana, Arial, Helvetica" id="quote">quote:<hr height="1" noshade id="quote"><i>Originally posted by Graham Robertson</i>

... Do I push the widest diameter in first from the engine side?
<hr height="1" noshade id="quote"></font id="quote"></blockquote id="quote">
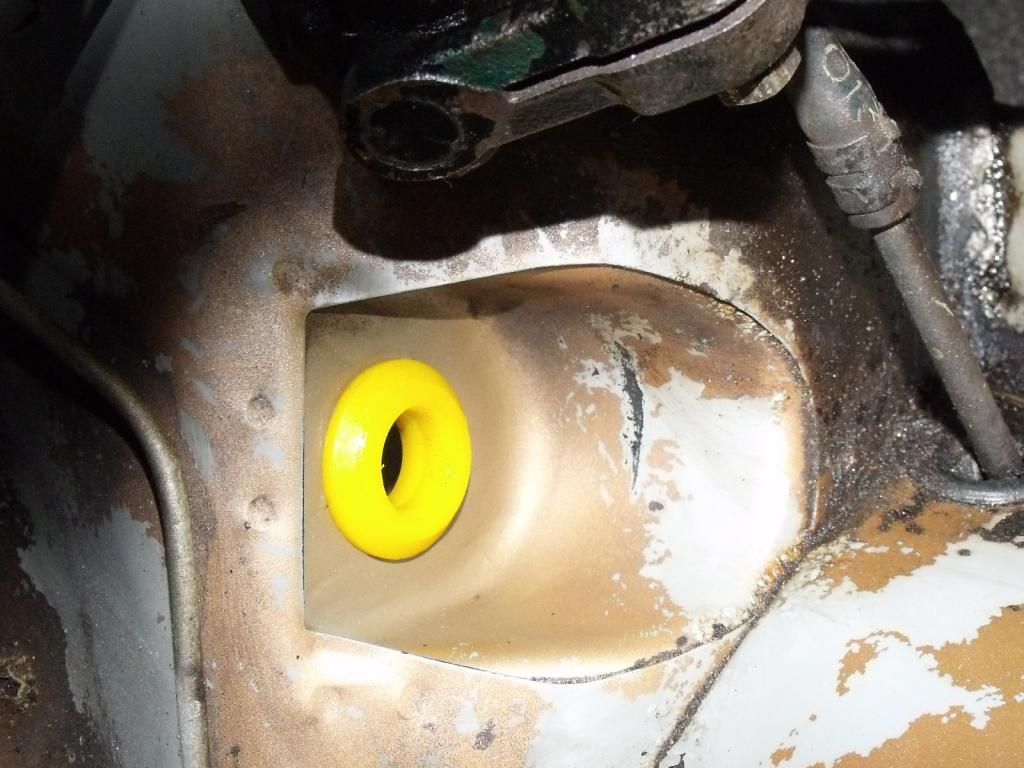
The narrower chamfered side is pushed into the bulkhead aperture from the engine bay side.

It's best to warm the bush in hot water first to make it more pliable.

fastman
Wedge Pilot
Posts: 425
Joined: 11 May 2005 03:32
Location: Canada
Contact:

Postby fastman » 04 Sep 2013 00:44

That is good advice. Heat the bush in water for 5 min. prior to installation. Some members have cut into one side of the bush to allow easy fitment. I didn't need/want to after using the hot water trick.

Graham Robertson
Wedge Pilot
Posts: 384
Joined: 15 Mar 2007 19:37
Location: United Kingdom
Contact:

Postby Graham Robertson » 04 Sep 2013 05:43

Thanks for the advice everyone. Mildred - regarding your quick fix - I'm wondering what's to stop me using the same method but with the 'proper' new bush? That is, by cutting and re-glueing?

Graham

Graham 1982 TR7 dhc Pharoah Gold

busheytrader
TRemendous
Posts: 3145
Joined: 14 Oct 2007 17:49
Location: United Kingdom
Contact:

Postby busheytrader » 04 Sep 2013 11:54

I've got mine still to do. I doubt if it will pass the MOT if not [:(]

Image Image

TR7 V8 DHC Jaguar Solent Blue. 9.35cr Range Rover V8, Holley 390cfm, JWR Dual Port, 214 Cam, Lumention, Tubular Manifolds, S/S Single Pipe Exh, 3.08 Rear, 200lb Spax & PolyBushes all round, Anti- Dive, Strut-Top Roller Bearings, Capri Vented Discs & Calipers, Braided Hoses, 4 Speed Rear Cylinders, Uprated Master Cylinder & Servo, AT 14" 5 Spokes or Maestro Turbo 15" Alloys, Cruise Lights, S/S Heater Pipes, Replacement Fuel Tank. No Door Stickers. Mine since July 1986, V8 from 1991 courtesy of S&S V8 conversion and big brake kits.

Workshop Help
TRiffic
Posts: 1891
Joined: 27 Feb 2007 23:52
Location: Worldwide

Postby Workshop Help » 04 Sep 2013 12:03

Yes, I've done that as well. I discovered the material used for the bush is non permeable. Which is to say, Super Glue has no pores to get into to provide a bondable surface. It won't stick, not for long anyway.

My El-Cheapo method uses normal porous glueable rubber. While it lacks the expected service life, i.e. longevity, of the correct bushing, it makes up for this deficiency by being; A. Really cheap B. Quick and easy to install and C. Available anywhere and everywhere.

It also takes a whole lot less gumption to get busy on the chore. Yes, the correct repair is to pull the steering column and do it right the first time. Then wait another 5 or so years to do it all over again.

If you're the type with a loud mouth conscience, do it the factory recommended way. If not, as the French say, 'Se le' vie'.

Mildred Hargis

nick
TRiffic
Posts: 1679
Joined: 07 Apr 2005 02:00
Location: USA
Contact:

Postby nick » 04 Sep 2013 16:32

Last poly that I installed went in quite easily after I let it soak in very hot water. It made it quite compliant and popped into place without much fuss.

I got so frustrated with the first one I ever installed that I cut it and took out a small section. That was a bad idea in that it then squeezed the column and increased steering force.

Image[img][IMG]http://i615.photobucket.com/albums/tt234/nickmi/TR7%201975/Yellow.jpg[/img]
nick
'79 TR7 DHC
'76 TR7 FHC

Graham Robertson
Wedge Pilot
Posts: 384
Joined: 15 Mar 2007 19:37
Location: United Kingdom
Contact:

Postby Graham Robertson » 04 Sep 2013 18:31

Well I made the mistake of going out to the garage tonight "just for a look" (in my good work shirt) and decided just to start. I'm actually really pleased with myself albeit my friendly neighbour (Danny on this forum - Ex TR7 owner) gave me a little help.

I got the steering column out and actually managed to push in the new bush with out too much trouble and without having to heat or cut it.

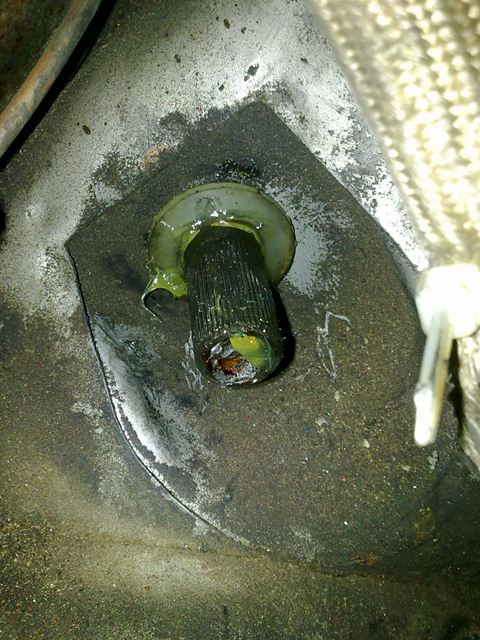
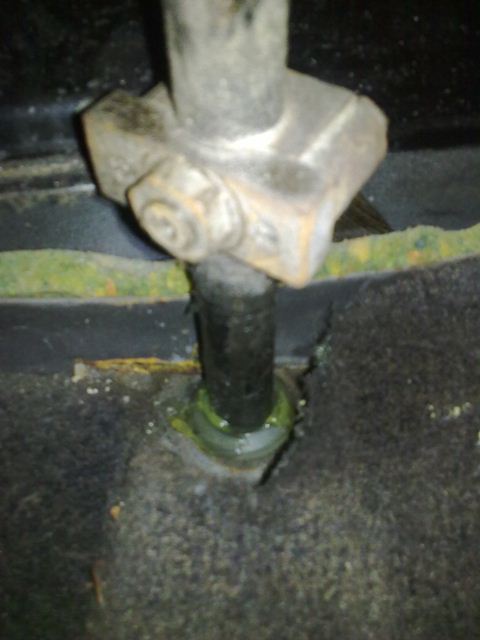
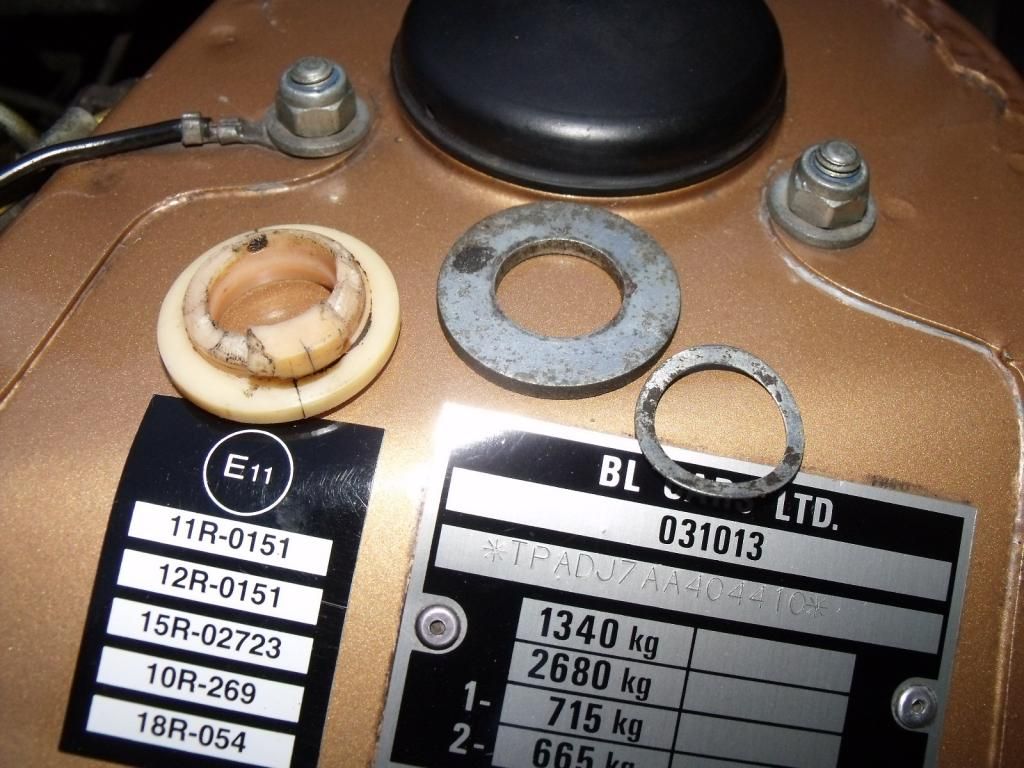
I note that the old bush was definitely fitted from the inside. Also when we got the steering column detached two washers fell out, not just one (see photo). Any idea which order these go back?

I'll hopefully get everything back together tomorrow night.

(There's not much hope for my shirt though - should at least have rolled the sleeves up before I started!)

Image[/URL]

Image[/URL]

Graham


Graham 1982 TR7 dhc Pharoah Gold

jeffremj
Wedgista
Posts: 1285
Joined: 02 Jan 2005 22:47
Location: United Kingdom
Contact:

Postby jeffremj » 04 Sep 2013 20:05

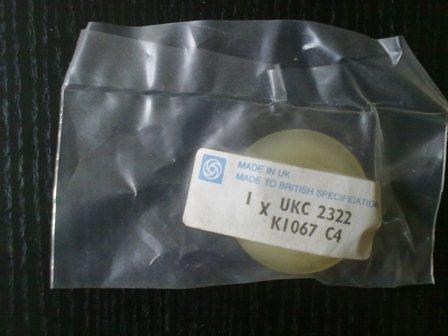
<blockquote id="quote"><font size="1" face="Century Gothic, Verdana, Arial, Helvetica" id="quote">quote:<hr height="1" noshade id="quote">I note that the old bush was definitely fitted from the inside. <hr height="1" noshade id="quote"></font id="quote"></blockquote id="quote">Your old bush doesn't look original. Here is mine that is fitted from the engine side:
Image

<blockquote id="quote"><font size="1" face="Century Gothic, Verdana, Arial, Helvetica" id="quote">quote:<hr height="1" noshade id="quote">Also when we got the steering column detached two washers fell out, not just one (see photo). Any idea which order these go back?
<hr height="1" noshade id="quote"></font id="quote"></blockquote id="quote">From the parts list and in my experience, the wider, flatter side of the bush is on the engine side. Once the steering column is through the bush, the big flat washer goes on first (WP14) followed by the thin springy washer (UKC5508).

In summary, the flat side of the bush is on the engine bay side. If your bush has a flat side inside the car, it is probably fitted incorrectly.

nick
TRiffic
Posts: 1679
Joined: 07 Apr 2005 02:00
Location: USA
Contact:

Postby nick » 04 Sep 2013 23:32

The larger flat washer goes against the bushing and the wavey smaller one is next. So from the firewall forward you will have the bushing, next the thicker flat washer and last the thin wavey washer.
A picture is worth a thousand words.
http://www.rimmerbros.co.uk/Item--i-GRID006210

For the shirt, I would try OxiClean.


Image[img][IMG]http://i615.photobucket.com/albums/tt234/nickmi/TR7%201975/Yellow.jpg[/img]
nick
'79 TR7 DHC
'76 TR7 FHC

Graham Robertson
Wedge Pilot
Posts: 384
Joined: 15 Mar 2007 19:37
Location: United Kingdom
Contact:

Postby Graham Robertson » 05 Sep 2013 18:26

All sorted[:)]

The steering wheel was off centre when I finished so had to take it off and re-align it. The steering feels good with no play so all good!

Thanks for all the advice.

Graham

Graham 1982 TR7 dhc Pharoah Gold

bmcecosse
TRemendous
Posts: 2399
Joined: 14 Apr 2007 21:54
Location: United Kingdom
Contact:

Postby bmcecosse » 07 Sep 2013 16:03

This was a job I dreaded doing a year ago - it turned out to be very simple following advice from here - I didn't remove the steering column - I just slid the inner part up enough to get the new bush on the rod, and if I remember correctly I made a small cut on the leading edge of the new bush to help it to 'wind' into the hole in the bulkhead. All done in less than an hour and solved all the 'loose' feel in the steering. Very pleased! And still perfect a year later.

Image Image ImageImage

UKPhilTR7
TRiffic
Posts: 1931
Joined: 24 Mar 2005 12:52
Location: West Midlands, England

Fitting a polly steering bush

Postby UKPhilTR7 » 09 Jul 2014 05:41

I have the new bush and I have read on how to do it. Apart from being a tricky one man job that because I am using a polly bush, may take a day to do, it seems straight forward. I have however one question that I would just like to clarify.

Does the new bush get pushed in from the engine side into the bulkhead and with the smaller bush end in first?

Image Image

jeffremj
Wedgista
Posts: 1285
Joined: 02 Jan 2005 22:47
Location: United Kingdom
Contact:

Postby jeffremj » 09 Jul 2014 11:12

<blockquote id="quote"><font size="1" face="Century Gothic, Verdana, Arial, Helvetica" id="quote">quote:<hr height="1" noshade id="quote">Does the new bush get pushed in from the engine side into the bulkhead and with the smaller bush end in first?<hr height="1" noshade id="quote"></font id="quote"></blockquote id="quote">You do with the original:

Image

Image

UKPhilTR7
TRiffic
Posts: 1931
Joined: 24 Mar 2005 12:52
Location: West Midlands, England

Postby UKPhilTR7 » 10 Jul 2014 00:00

Thanks for the pictures and the reply. It helps me put it into context and I think that will be a job for this weekend.

Image Image

jeffremj
Wedgista
Posts: 1285
Joined: 02 Jan 2005 22:47
Location: United Kingdom
Contact:

Postby jeffremj » 10 Jul 2014 06:37

Don't forget that the original item had a cut in the small part such that you screwed the bush in - you didn't have to push it in. I took seconds to get it to fit. No heating was required.

Post Reply

Who is online

Users browsing this forum: No registered users and 15 guests

cron