Long ago on a cold winter's day, I was driving home from work (everyday car then) when steam instantly filled the interior. The rubber seals linking the heater pipes to heater matrix had let go, only I didn't know that at the time. Luckily I was only 2 miles from home and slowly limped back with the V8 just above idle, windows wound down in my own private sauna. I later by-passed the heater using a couple of copper elbow joints in the engine bay.
The arrival of my son, a house move and an awol heater saw my 7V8 become a summer and fine weather car. Several layers of clothing had to be worn at times, brrrr! Le Mans and back no problem. In fact I never raised the hood for years as I could garage it under a dust sheet at home.
I bought Robsport's replacement seals a few years ago but never got around to replacing them as I suspected a duff matrix. I decided to source or rebuild a good heater box and swap the original to save on TR7 down time. Last winter I bought a "restored" box through Ebay which was rubbish but later obtained an ace second hand box from James Paddock. I made a better box from both of them, replaced the rubber seals and fitted Robsport's stainless steel pipes as all were badly rusted. It passed a pressure test as well. Thanks also to Paul W who donated lots of useful sponge for the internal flaps.
Last week I finally swapped over the heater boxes. It took about 2 1/2 days and was about as much fun as replacing the fuel tank. The heater box had been firmly stuck front and back with thick white caulking compound. (Neither of the replacement boxes had any of this gunk so I guess an over enthusiastic repair before my ownership) I managed to remove the dashboard with the steering wheel in place. The Haynes manual said otherwise but that's probably for the FHC and its restricted workspace. I didn't have any parts leftover but am now short of several dasboard screws as many weren't fitted. Additionally I spent ages chasing a bad fog lamp connection behind the dash when both bulb holders needed cleaning out instead............
I now have heat on my feet................


Adam

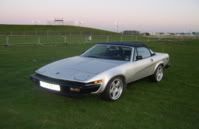
TR7 V8 DHC Jaguar Solent Blue. 9.35cr Range Rover V8, Holley 390cfm, JWR Dual Port, 214 Cam, Lumention, Tubular Manifolds, S/S Single Pipe Exh, 3.08 Rear, 200lb Spax & PolyBushes all round, Anti- Dive, Top Roller Bearings, Capri Vented Discs & Calipers, Braided Hoses, 4 Speed Rear Cylinders, Uprated Master Cylinder & Servo, AT 5 Spokes and Cruise Lights. No Door Stickers. Mine since July 1986, V8 from 1991