Anonymous

TR7 seat covers

Here’s where to discuss anything specific about your standard(ish) car or something that applies to the model in general.
Post Reply
Howard722
Rust Hunter
Posts: 176
Joined: 25 Feb 2008 07:22
Location: United Kingdom
Contact:

Postby Howard722 » 22 Sep 2008 07:36

<font face="Comic Sans MS">How long have you got?-to write down all the tips and wrinkles would take for ever. You need to get hold of a copy of `How to restore TR7&8` by Roger Williams, you need plenty of room and a solid table covered with an old carpet or similar to work on, a digital camera to take pics. as you strip out the first one (cut you finger nails or you will pay with pain) and take your time.
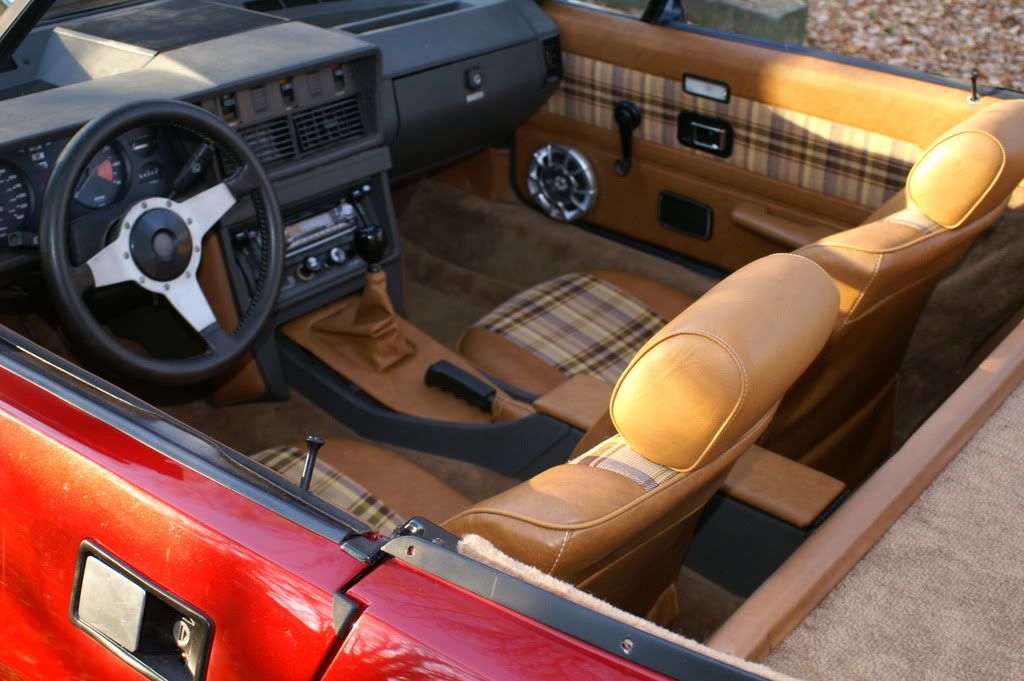
The base is straight forward , the back more complex as you have to unglue the bottom rear flap and release all the clips you can find, esp. the round ones and then look about a third way up to find and release the clips that hold the linen straps to the seam line that defines the outside shape. Then push your hands up the sides to release any stray glue that has stuck the covers to the foam-a few tugs and it should come off in one piece. You now have to decide if the foams and rubber straps etc. need to be renewed-esp. the base diaphragm!
If you are not good with craft skills then it will be a trial but, very rewarding-allow a week, but first you have to get the seats out. Start with the pass. as then the car is still drivable!
Hope this helps your decision! </font id="Comic Sans MS">

Enjoy& regards Image

Bill
Rust Hunter
Posts: 211
Joined: 22 Aug 2005 18:51
Location: USA
Contact:

Postby Bill » 22 Sep 2008 13:30

<font face="Arial">I replaced my seat cover's with new ones from VicBrit. Each seat took about 45 minutes (once the seat was removed from the car). All you will need is a can of spray adhesive, a flat screw driver,a pair of adjustable plyers (to put the clips back on with) some patience and a large clean work surface.

It's pretty straight forward; an easy "do it yourself" type of project. Just remember (or photograph) where all the clips go, and yes, glue on the flap. I added a one inch foam piece to the lumbard area of the seats,(between the existing foam and the straps), it provides for much greater support. Also, while you have the seats apart, I highly recommend you replace the seat bottom diaphragm's (part # 16-668 in VicBrit catalog).

</font id="Arial">

Bill
1980 Persian Aqua DHCImage

FI Spyder
TRemendous
Posts: 8910
Joined: 03 Jul 2006 19:54
Location: Canada

Postby FI Spyder » 22 Sep 2008 19:11

I replaced diaphrams, mine had splits in them, it firmed up the seat bottoms nicely. Used cords and locking pliers help reattach clips. Toughest part of job as you have to put enough pressure on the diaphram to stretch it while you hook the clips. The seat/back foam is a little hard at edges and seat covers like new so left that part. The foam in headrests had turned to dust so replaced that with foam I picked up at auto upholstery co. Put plastic bag over foam to put cover back over the foam as it tends to stick to the foam. Then pull what plastic you can out. If it doesn't come out you can leave it in with no ill effects. You won't even know it's there. You can use plastic trick to slip back covers over seat back, some people spray foam with silicone spray but I haven't done it so can't give any first hand on that.

TR7 Spider - 1978 Spifire - 1976 Spitfire - 1988 Tercel 4X4 - Kali on Integra - 1991 Integra
Image

MickeyR
Wedge Pilot
Posts: 364
Joined: 05 Feb 2007 13:03
Location: USA
Contact:

Postby MickeyR » 23 Sep 2008 13:07

Did mine myself as well, and they came out very nicely. I do have to pull the driver's seat back out and tighten the bottom cover a bit, but otherwise they look great.

The plastic bag trick is absolutely essential. Makes the cover slip down over the foam quite easily. And in addition to the extra bit on the lumbar section, I seem to remember a bit of a void in the back of the bottom cushion, so I cut a piece of old foam that was still good and inserted it there.

Very happy with the results, even though I approached the whole job with lots of anxiety!

Not a great view, but here's the interior right after I finished:

Image

Mickey

Maxwell
TRiffic
Posts: 1641
Joined: 19 Jun 2008 21:30
Location: United Kingdom
Contact:

Postby Maxwell » 26 Sep 2008 07:39

Hi Juh..... Fingers crossed it all goes OK.
I'd do the driver's seat first: it's the one you don't see when you're sitting in the car! Maxwell [:D]

mb4tim
Wedgista
Posts: 1236
Joined: 27 Aug 2006 13:46
Location: USA
Contact:

Postby mb4tim » 26 Sep 2008 12:41

are the seat covers specific to a side, or are the the same. I want to make new covers for mine, and would like to use the passenger side as a pattern for both seats, if possible.

This way, the driver seat is only out for recovering, not cutting, fitting, and sewing.

-Tim
http://www.morSpeedPerformance.com
ImageImage

Image Image Image Image Image Image Image

Howard722
Rust Hunter
Posts: 176
Joined: 25 Feb 2008 07:22
Location: United Kingdom
Contact:

Postby Howard722 » 26 Sep 2008 12:50

mb4tim-<font face="Comic Sans MS">-No probs.-the seats covers etc. are the same, its only the seat-frame that is handed.[:)]</font id="Comic Sans MS">

Enjoy& regards Image

Post Reply

Who is online

Users browsing this forum: No registered users and 49 guests