Page 1 of 2

Wiring... Where do I start?

Posted: 28 Jan 2014 18:53
by scarface031
Hello fellow TR7 owners!

I just took my dashboard off last night in order to start repairing broken and old connections.

The problem is, I have no idea where to start.
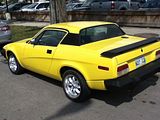
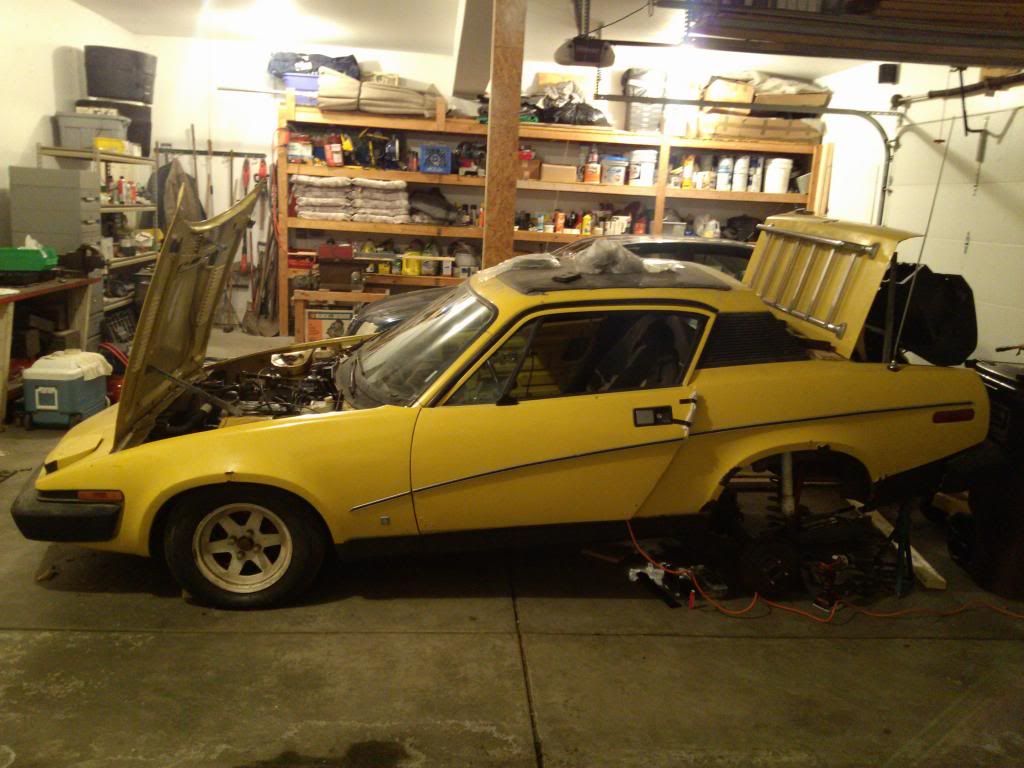
Here is my car!

Image


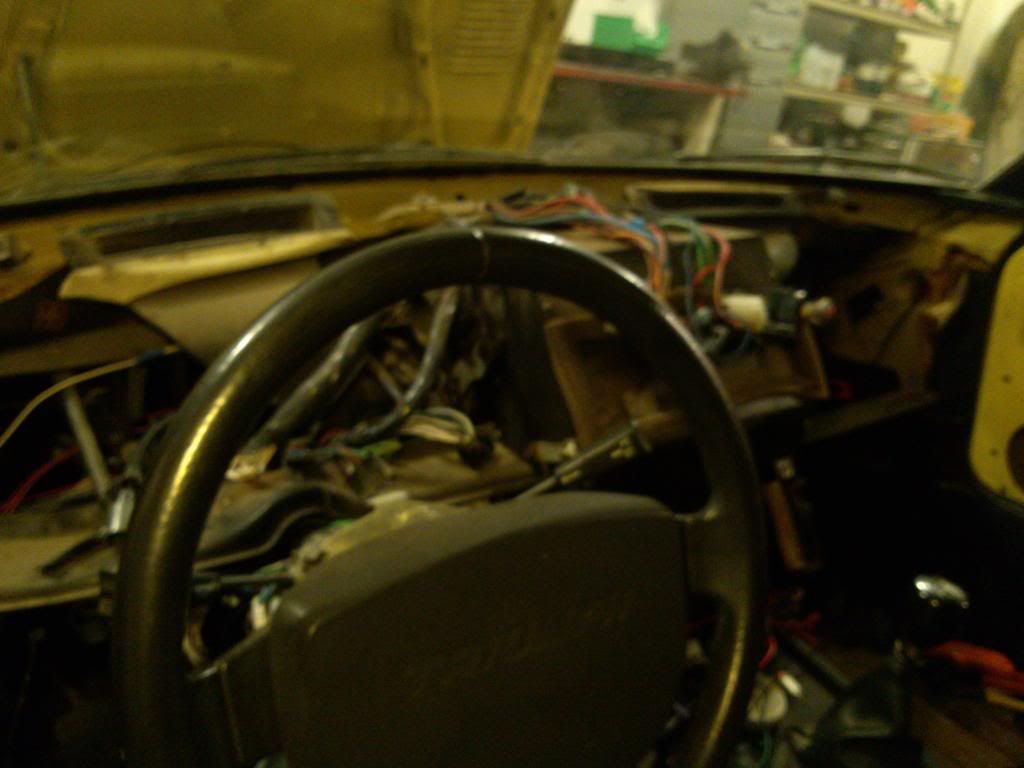
As you can see the dash is gone!

Image


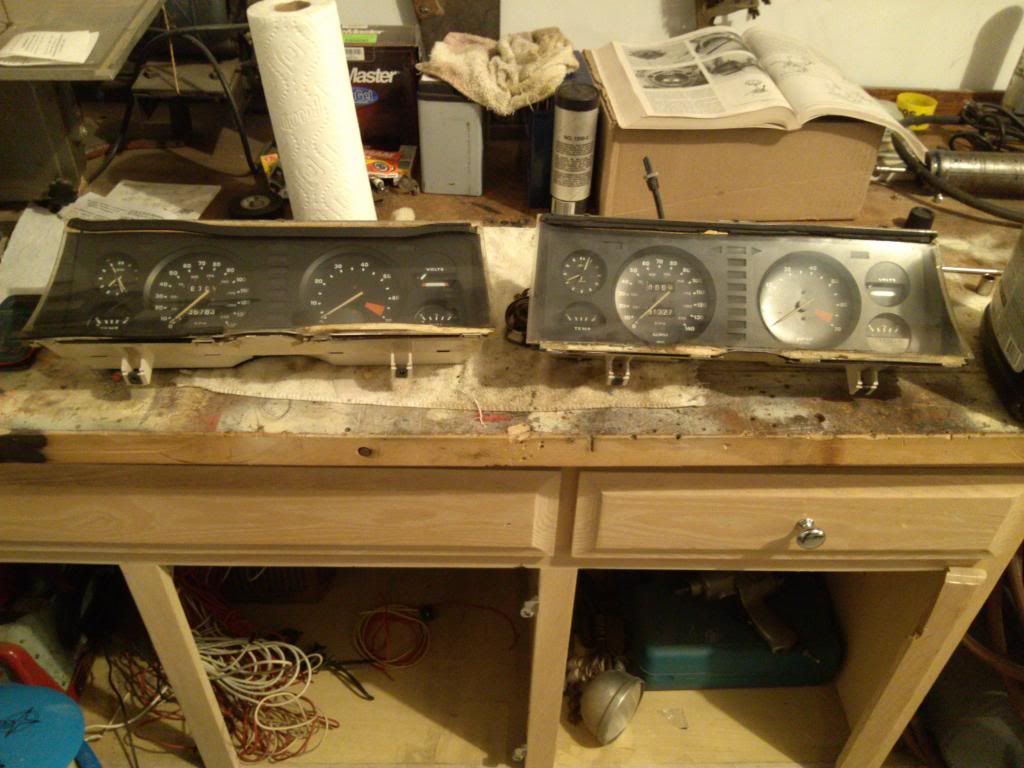
Which gauge cluster should I use, I have two :P

Image


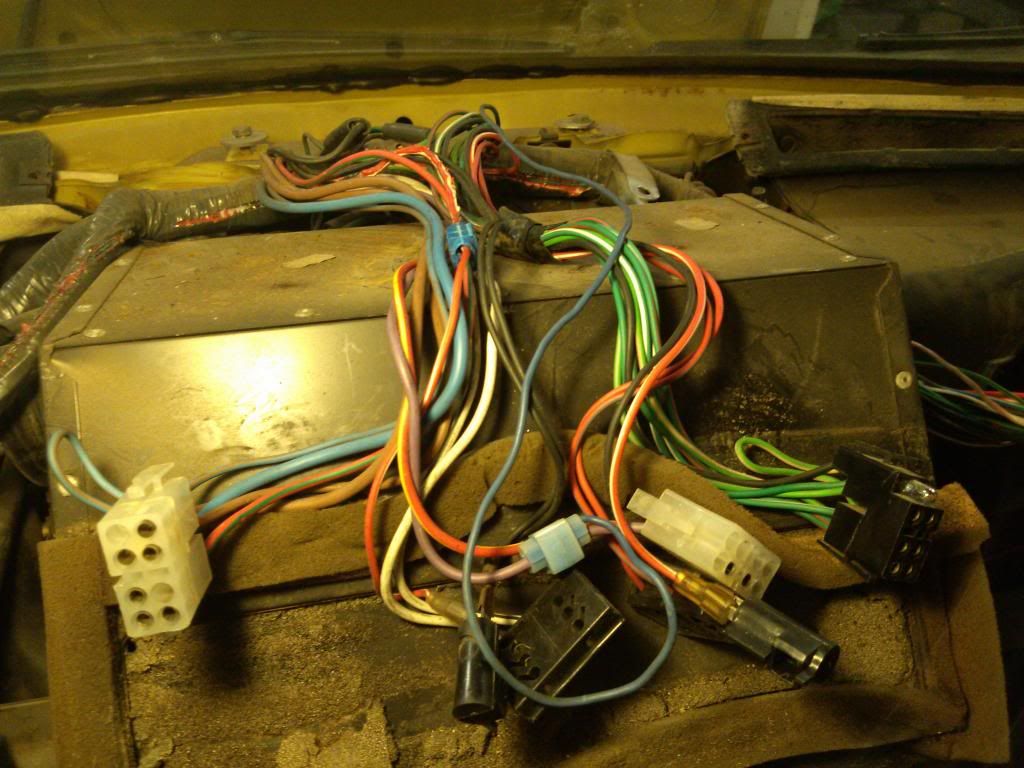
Where the gauge cluster sits.

Image


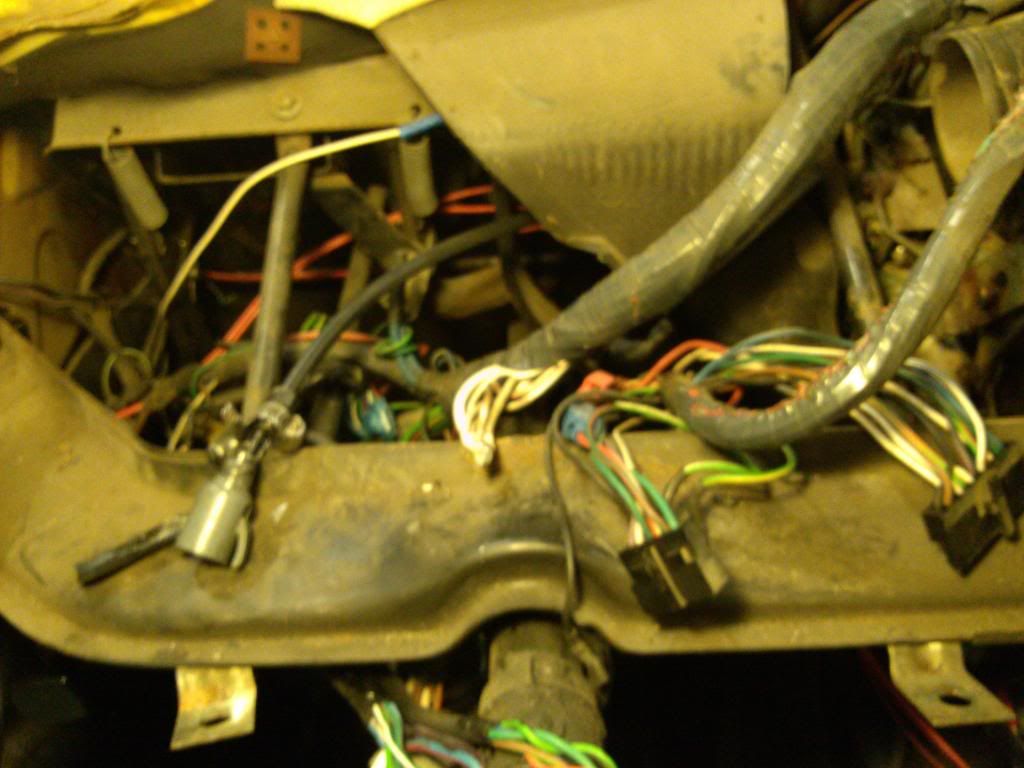
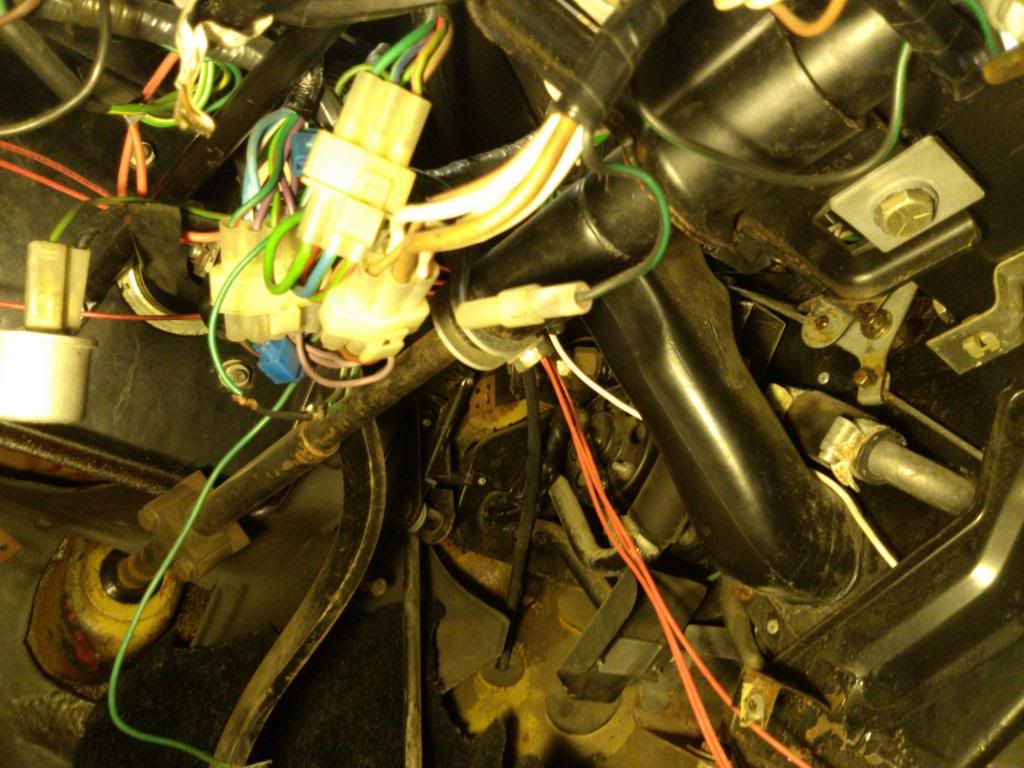
Under the gauge cluster.

Image


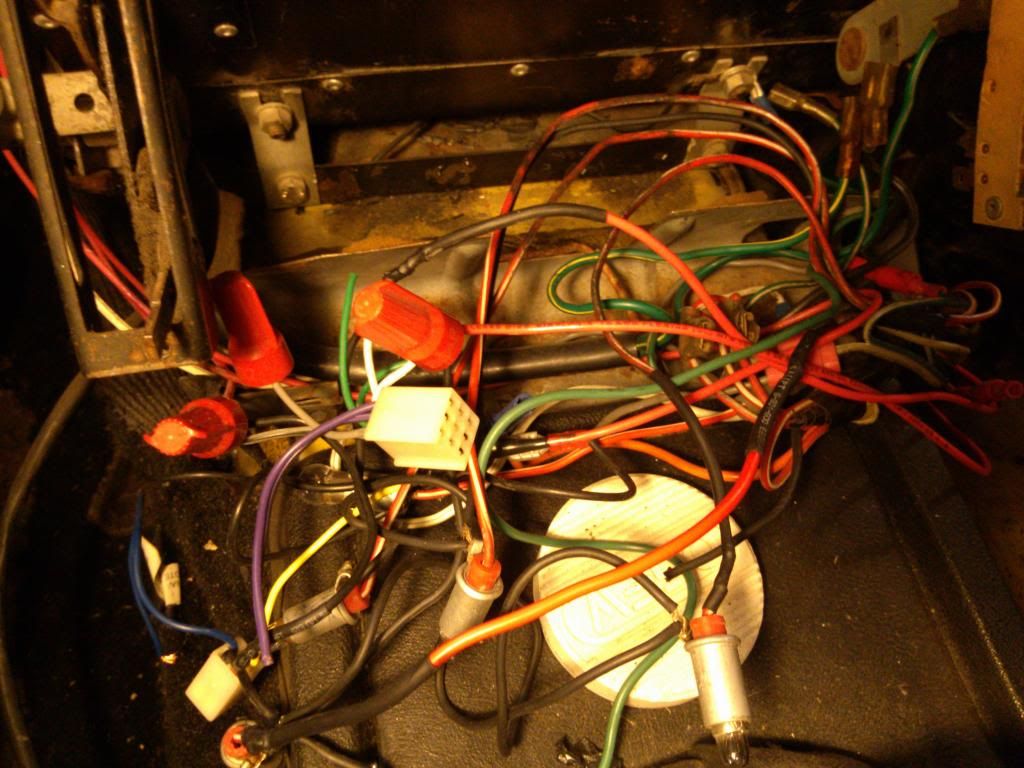
All my switches for the lights!

Image


Blah! Radio mess.....

Image


So I am very confused on what to do.

The main harness is sort of splitting with red glueiness along the split, what is that?

I was thinking a wire shorted and was over heating?

Posted: 28 Jan 2014 19:42
by DNK
Interesting Red factory connections they used
Image

Don
Stick a Wedge In It
80 TR7 V8 Kick in the pants
Image

Posted: 28 Jan 2014 20:07
by Beans
Certainly not factory connectors.
Only one way to do this properly, check each individual wire and clean all connectors.
Which means unravelling the complete wiring loom, not as daunting as it sounds as long as you work methodically. But otherwise you'll miss damage like this ...

Image

And for extra reliability you could change corroded connectors with modern ones ...

Image

<center>Image
<font color="blue"><i>1976 TR7 FHC (needs some TLC ...)
1980 TR7 DHC (my first car, a.k.a. Kermette)
1981 TR7 FHC (Sprint engined a.k.a. 't Kreng
</font id="blue"><b>[url="http://www.tr7beans.blogspot.com/"]<u><b><font size="3"><font color="red">My full Blog</font id="red"></font id="size3"></b></u>[/url]</b></i></center>

Posted: 28 Jan 2014 20:37
by fastman
I agree with Beans. I would most likely go by circuits. Start with perhaps the lights, or instrument cluster and work your way through, cleaning and repairing along the way. Get rid of those scotch locks in pictures 4,5,6 and other craziness like those marrettes (sp). You need a wiring diagram for your model (jclay's site I think) if you don't have a manual. Any question can be had here on the forum.

Also...your spoker wheels are the biz.


TR7 FHC
Image

Posted: 28 Jan 2014 20:49
by saabfast
With the instrument clusters, there is a chance that it you make a hybrid of the two you may end up with one with both the clock and the fuel gauge working!

Alan
Saab 9000 Stg 1 (now passed to son for his family car)
Saab 9000 2.3 FPT Auto (now gone that others might live)
Saab 9000 2.3 LPT Auto
Saab 9-5 2.3 Vect Auto Estate
'81 TR7 DHC
Image

Posted: 28 Jan 2014 21:09
by scarface031
What exactly do I need to take apart in order to remove the main wiring harness?

Posted: 29 Jan 2014 00:38
by Peter Nuss
Your harness is toast!!! You had at least one wire go to dead short. That's what the melted wire harness tape is telling you. When that happens, that shorted wire burns through all of the other good wires at some point. Plus all the plastic jumpers in there equals real bad issues. I've rebuilt lots of harnesses and I can tell you this. Those early harness are not worth messing with. Buy a used harness out of a late model car (79 up) and go through that one using what ever correct color coded wires you can reuse from this harness. There's a guy in Indianapolis right now parting out a late model TR7 for engine issues. Look on craigslist for the listing. I've bought really nice complete harnesses for less than $40. You'll spend $400 plus just buying wire and connectors to put yours back to shape and maybe a hundred hours of labor or more.

Oh yeah, you should make friends with British Wiring LTD in the US. They have all that you'll need to assist in the harness tasks. With a little luck you'll find a used harness that needs almost no work. I have several times.

TR8

Posted: 29 Jan 2014 03:46
by scarface031
You make it sound so easy, i believe british ltd sells the main harness for $710. I dont really want to throw that much money away.

Posted: 29 Jan 2014 04:08
by scarface031
I found a harness, I am not sure if it is the right one.

http://www.rimmerbros.co.uk/Item--i-GRID006248


The vin is ACL029106U


Is RKC2876 going to fit in my car?

Posted: 29 Jan 2014 05:00
by john 215
Hi,

I have to agree with others your loom has had a un-fused short, that looks what's caused the damage in the picture above your heater, if you were to un-wrap the loom at a guess you will find the offending wire melted to others. It is possible to repair with the correct size wiring but also can be a lot of work. Get rid of those scotch locks, hate those things ' fire starters ' with a passion [:(!] the work of the devil !

Don't forget you need some of this to put back in the loom, if you repair the loom [:p] -


Image


Not sure about that Rimmer part, email them don't forget could be for a RHD car though [?][?][?]

Cheers John


ImageImageImage Image
LIVE LIFE A QUARTER OF A MILE AT A TIME!

1976 Speke FHC Beauty Now with an overdrive conversion

1979 3.5 FHC(STATUS PENDING!!)

1982 2.0 DHC NOW A 4.6, BUILT NOT BROUGHT !!!!

Posted: 29 Jan 2014 06:42
by Beans
<blockquote id="quote"><font size="1" face="Century Gothic, Verdana, Arial, Helvetica" id="quote">quote:<hr height="1" noshade id="quote"><i>Originally posted by Peter Nuss</i>

... Those early harness are not worth messing with. Buy a used harness out of a late model car (79 up) ... <hr height="1" noshade id="quote"></font id="quote"></blockquote id="quote">
That's exactly what I will be doing with my new project.
But I will change all connectors for new modern ones.

Image

<center>Image
<font color="blue"><i>1976 TR7 FHC (needs some TLC ...)
1980 TR7 DHC (my first car, a.k.a. Kermette)
1981 TR7 FHC (Sprint engined a.k.a. 't Kreng
</font id="blue"><b>[url="http://www.tr7beans.blogspot.com/"]<u><b><font size="3"><font color="red">My full Blog</font id="red"></font id="size3"></b></u>[/url]</b></i></center>

Posted: 29 Jan 2014 07:19
by trickyx12000
Its all repairable... the wire that looks damaged to me is red/white... which from memory should be back illumination for the clocks/ dash etc....
it may look a major task but just start at the easy stuff and work up....

Posted: 29 Jan 2014 14:03
by FI Spyder
A lot of good advice here. Depends on how OCD you are. I would pull the heater while you are at this stage, clean it up, check for leaks, flush the matrix, replace foam, lube moving parts, tighten linkages. Then I would back the car out of the garage and power wash the interior to get all the crap (dust) out. Plan on removing any old/bodged wiring. Clean all connectors with electrical contact cleaner or use new style ones like Beans suggests if you want to go that far. New wiring is expensive and I would tend to use the existing stuff, by going over it you will become very familiar with it (a good thing). Carefully inspect the wiring for crimped damage as per Beans photo. As far as the instrument modules go, carefully check the condition of the plastic circuit as these can beak with age. Clean all contact points in it (I use Brasso for that). This includes the lands on the plastic circuit, were the wires connect, were the instruments connect, all the bulb contacts and their holders. For hard to reach spots I flush out with aerosol contact cleaner. The wiring connectors are crimp on so some people will solder these for more reliable connections, I've only done that on one that pulled out (12v feed in console) that had resulted in no dash lights till I diagnosed the problem. This should not only be done on interior but through out the car. Once done you will have a reliable system with no more Lucas jokes. All part of the journey of restoring a car.

Take lots of pictures with your digital camera so you know how stuff goes back together and future reference, you won't remember.

- - -TR7 Spider - - - 1978 Spitfire- - - - 1976 Spitfire - - 1988 Tercel 4X4 - Kali on Integra - 1991 Integra - Yellow TCT
Image

Posted: 29 Jan 2014 23:02
by scarface031
First of all, I would like to thank everyone for being so active and for offering genuine advice!


How would I go about removing the harness? Does anyone have any tricks in removing it? What components should I remove and how do I make this easier?

Posted: 30 Jan 2014 01:43
by jclay (RIP 2018)
OK, it is not one huge harness. It is a combination of smaller harnesses, so take one thing at a time. Pull one out and repair it, then move to the next one.

Send me an email by clicking on the mail icon "Image" above and I will send you a good wiring diagram. It is for TR8s, but still works well for TR7s.

Also, read through this page, [url="http://www.jclay.me/jclay/Wiring_Harness.html"]Wiring Harness[/url] to get an idea of how to rebuild a section. With some pre-planning, patience and attention to detail, you too can rebuild the wiring harness.

Clay

[url="http://www.jclay.me/"]My Triumph Site[/url], [url="http://www.triumphtechnical.me"]Technical Stuff[/url], [url="https://docs.google.com/folder/d/0B8MWEvqOpX3udEF4SmFQUW9RS09hbU5uNW5Wd0xrUQ/edit"]My Public Folder[/url],